


October 7, 2026
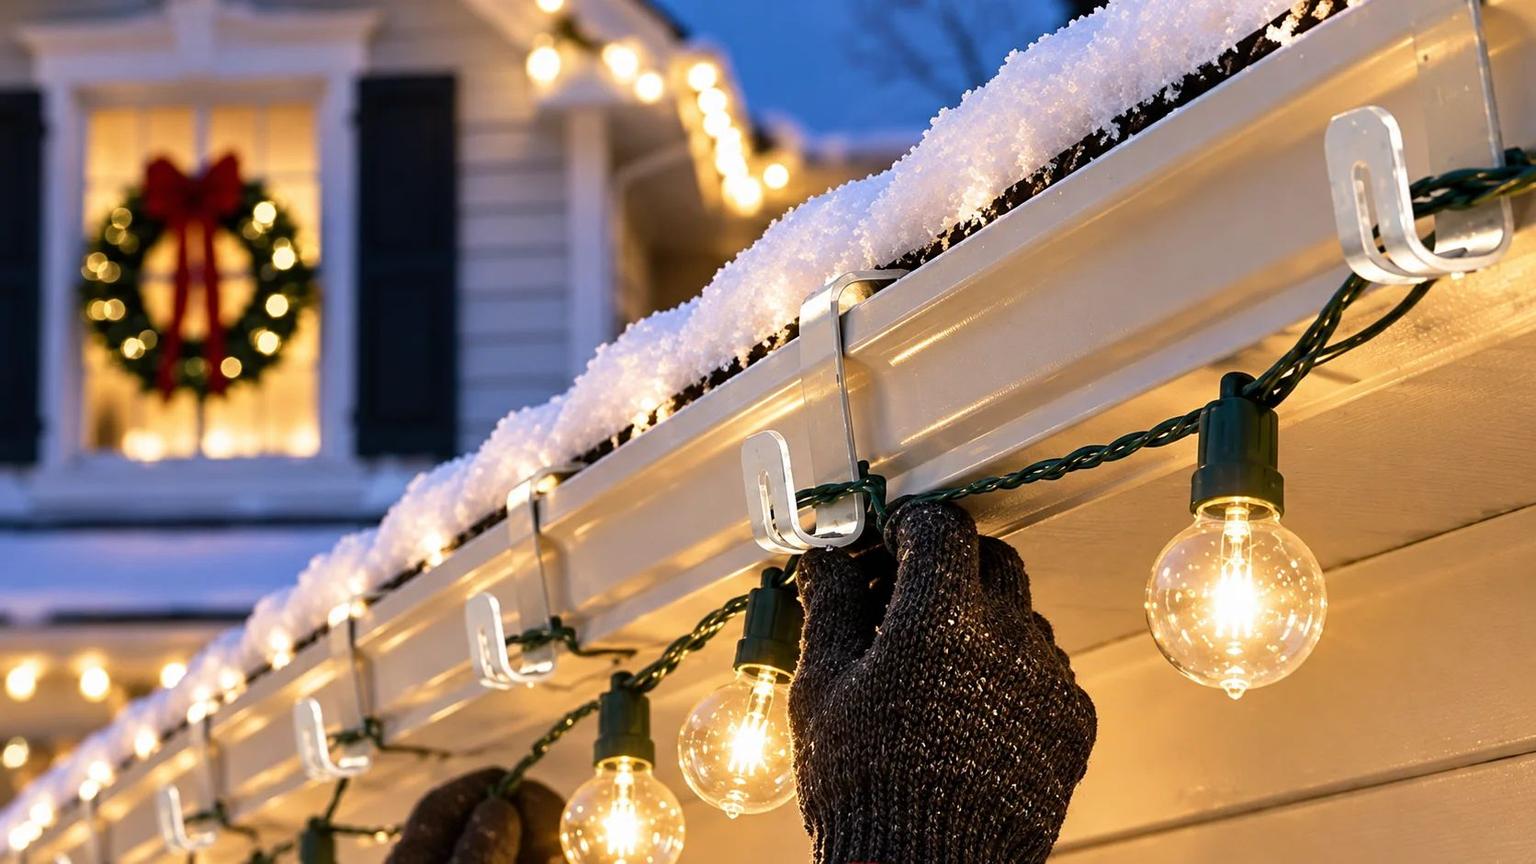
When planning your Christmas lights installation, choose clips by the surface they grip, not by a “universal” label. For C7/C9 lights, roughly 12-inch spacing is a starting point; follow the clip instructions, keep drainage clear, and never force a clip into place.
Your four options depend on your roofline:
The trade-off? A secure fit does not make heavy ice or sliding roof snow safe. Check fit, winter hold, removal, and drainage before hanging lights. Clean gutters first, inspect storm damage from the ground, and unplug lights before removing each clip separately on a mild day above freezing.
Use the surface-by-surface guide below to choose your mounting point and avoid damage during installation and removal. If the process seems too complex, you may want to choose a professional installer to handle the heights and hardware for you.
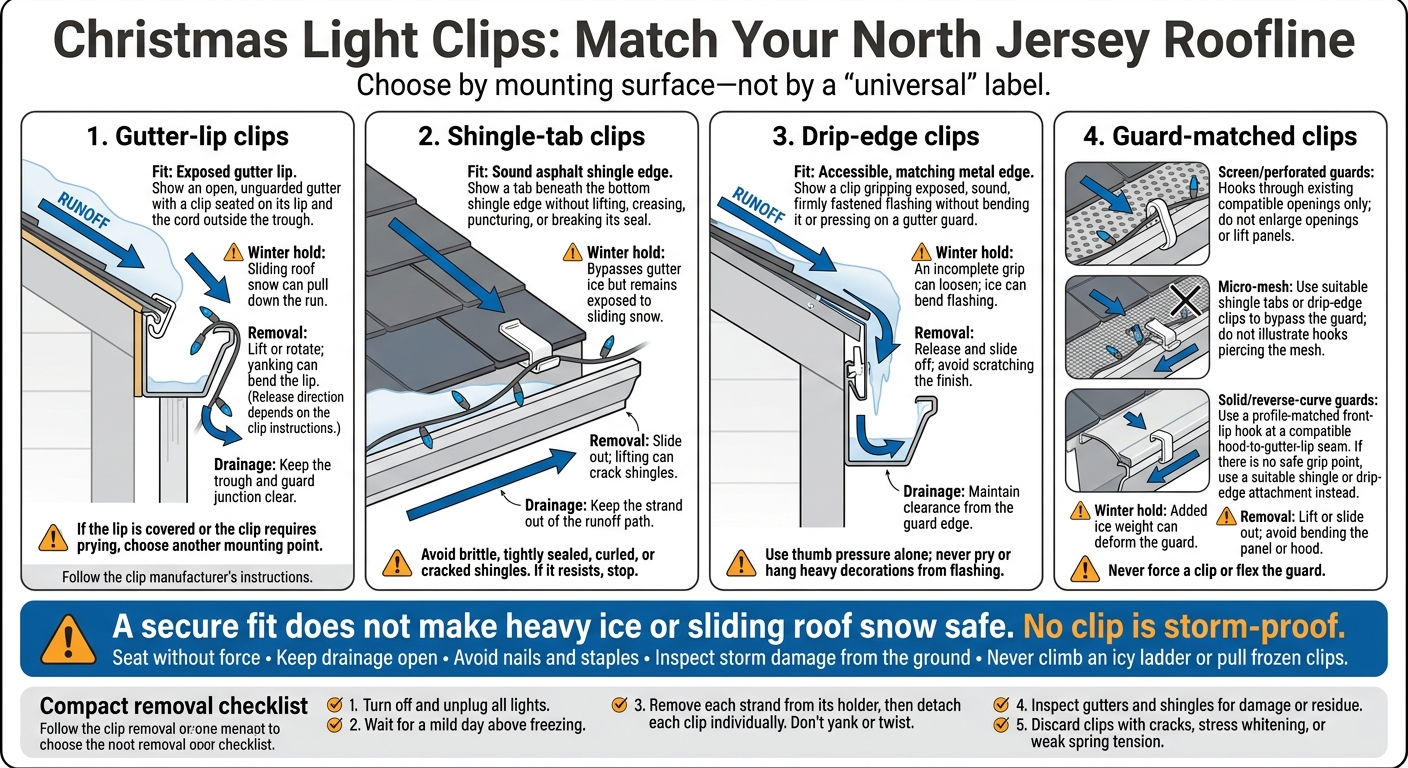
Christmas Light Clips: Match Your North Jersey Roofline
Lip clips are the default choice for open, unguarded gutters. Spring-tension clips flex to grip the lip, while friction-fit clips slide snugly over it. Choose a clip that matches your gutter profile and lip shape. It should seat with thumb pressure. If you need to pry it into place, choose another mounting point - forcing it can bend or scratch the lip.
A properly seated clip grips the exposed lip. Space clips roughly 12 inches apart for C7/C9 bulbs and 6–12 inches apart for mini lights. Closer spacing helps reduce sag and wind lift. Keep the cord outside the gutter trough so frozen water won’t trap it.
Remove clips one at a time, following each clip’s release direction. Some come off with a slight upward flick. Support the strand rather than pulling several clips off at once. Proper removal leaves no residue or holes and helps protect the finish.
Keep clips and cords out of the drainage path. If a guard covers the lip, skip lip clips and move to the gutter-guard section. If the lip isn’t exposed, move to the next mounting surface.
Use shingle-tab clips when exposed shingle edges serve as the mounting point.
Shingle-tab clips work on homes with gutter guards or no gutters, as long as the bottom shingle course is sound and flexible. Gently slide the tab beneath the bottom edge. If it resists, stop.
Avoid brittle, tightly sealed, curled, or cracked shingles. Never break a seal or lift, crease, or puncture a shingle. Nails and staples damage fascia and gutters and can void the shingle warranty.
Friction and the shingle’s weight hold the tab in place. That grip resists wind well, but North Jersey ice and snow can pull on protruding tabs and disturb the shingle edge.
Wait until roofline ice has melted and the weather is mild. Unclip each bulb individually, then slide the clip out the same way it went in. Stop if it resists - don’t force it. When removed this way, friction-fit tabs leave no residue or holes.
Shingle tabs bypass gutter guards, but placement matters. Keep bulbs and cords in front of the gutter or guard, not across the runoff path. Neither the tab nor the strand should block water or direct it behind the gutter onto the fascia.
For gutter prep and cold-weather handling, see how to clean gutters before hanging Christmas lights. If the roof edge is metal rather than shingle, use drip-edge clips next.
Use drip-edge clips on metal roof edges only where the exposed flashing is sound and firmly fastened. The jaw should slide beneath the metal lip with thumb pressure alone. If you need to force or pry it into place, the clip isn’t right for that edge. Once it fits, check that the run stays stable through wind and freeze-thaw cycles.
Ice and snow can bend thin aluminum flashing or pull clips loose. Space clips about 12 inches apart to keep the strand straight and reduce wind lift. Don’t hang heavy decorations from the flashing.
Release the wire from each clip, then remove the clips along the same path they went on. This leaves no residue and helps prevent flashing damage. Never lever against the flashing or pull down the entire strand.
If the home has gutter guards, leave the drip lip’s runoff path open. Use drip-edge clips with gutter guards only when the jaw clears the guard without pressing on its mesh or hood.
For prep, see how to clean gutters before hanging Christmas lights.
For gutters with guards, match the clip to the guard profile - not the gutter lip. Check whether the guard is screen, micro-mesh, or solid/reverse-curve.
Screen and perforated guards can accept hooks through existing openings only. Don’t enlarge the openings or lift the panels. For micro-mesh, use shingle tabs or drip-edge clips to bypass the guard.
For solid or reverse-curve guards, use a profile-matched front-lip hook that slides into the seam between the hood and gutter lip. If there’s no safe grip point, attach to the shingles or drip edge instead. Never force a clip or flex the guard.
Ice adds weight at each attachment point. That weight can dent panels or kink the nose of a reverse-curve hood, changing how it directs water. Space clips about 12 inches apart to limit strand movement in wind. Avoid clips that trap water or block drainage.
Release the light wire first. Then remove each clip the same way it went on, without prying. This keeps the guard surface intact and the drainage path open. Don’t use nails or staples; they damage fascia and gutters.
Choose a clip that fits without denting the guard or blocking the water-entry path. If you’re unsure of the guard profile, review gutter guards.
For gutter prep and cold-weather handling, see gutter preparation before hanging Christmas lights.
The sections above explain each clip type. This side-by-side comparison helps you pick the right one fast.
Choose by mounting surface, not a general-purpose label. No clip is storm-proof. Match the mount to your roof edge, and keep it out of snow-shedding paths.
| Clip type | Fit | Winter hold | Removal | Drainage |
|---|---|---|---|---|
| Gutter-lip | Exposed gutter lip | Sliding roof snow can pull down the run | Lift or rotate; yanking can bend the lip | Keep the trough and guard junction clear |
| Shingle-tab | Sound asphalt shingle edge | Bypasses gutter ice but remains exposed to sliding snow | Slide out; lifting can crack shingles | Keep the strand out of the runoff path |
| Drip-edge | Accessible, matching metal edge | An incomplete grip can loosen; ice can bend flashing | Release and slide off; avoid scratching the finish | Maintain clearance from the guard edge |
| Guard-matched | Compatible opening or hood-to-lip seam | Added ice weight can deform the guard | Lift or slide out; avoid bending the panel or hood | Keep openings and the hood’s water-entry path clear |
Nails and staples damage fascia and gutters. Mechanical clips leave no residue. Remove clips one at a time instead of pulling the whole strand.
Keep drainage clear, too. No clip or strand should distort a guard or block its water-entry path.
For gutter prep and cold-weather handling, see our gutter preparation guide.
The pros-and-cons section below helps you weigh the options.
Match the clip to the surface first, then check how well it holds through winter and whether it leaves drainage open.
| Clip type | Advantages | Disadvantages | Best-fit situation |
|---|---|---|---|
| Gutter-lip clips | Fast hook-and-press installation; keeps clips off shingles. | Must fit the lip curl. Forcing a clip can crease thin aluminum, and it may not attach to a covered lip. | Open K-style or half-round gutters with an exposed lip. |
| Shingle-tab clips | Skips the gutter and works on gable rakes, dormers, and snow-shedding rooflines. | Cold shingles crack more easily, and bulbs sit farther back from the edge. | Gable rakes, dormers, and rooflines without gutters. |
| Drip-edge clips | Attaches to an accessible metal edge when gutter attachment isn't an option. | Needs enough flashing clearance. A tight clamp can bend thin flashing. | Gutterless eaves or guarded gutters with accessible, compatible drip-edge flashing. |
| Guard-specific clips | Attaches without lifting a compatible guard, keeping drainage open. | Must match the guard. Micro-mesh and inserts won't accept hooks, and ice can distort thin hoods. | Screens, perforated panels, or hood seams designed for the clip. |
Choose a clip that seats without force and leaves drainage open - no single type fits every roof.
Take the same care during removal: unclip the lights, then release each clip in the same direction it went on, without bending the surface.
Use the comparison above to choose a clip that fits your gutter lip, shingle edge, drip edge, or gutter guard. If your home has gutter guards, check compatibility before attaching anything. Avoid nails and staples - they damage fascia and gutters. For prep and cold-weather handling, see our gutter prep guide.
Follow the clip instructions and space the strand evenly, typically every 12 inches for C7/C9 lights and 8–12 inches for mini or icicle lights. Leave slack at corners, and don’t bunch multiple bulbs onto one clip. Use a ladder stabilizer or standoff to keep the ladder from resting on gutters or guards.
After North Jersey snow or ice storms, inspect the lights from the ground. Never climb an icy ladder or pull frozen clips.
If the roofline is too steep or you’re unsure about the fit, use our Christmas light services, especially for two-story homes or complex rooflines.
Remove lights carefully, one clip at a time.
Removal checklist
Your roofline decides the clip. Exposed lips, sound shingle edges, accessible flashing, and guard profiles each take a different attachment, and a clip that needs force belongs on a different surface. A secure fit has limits: ice and sliding snow can pull down a well-seated run, so take lights down before a major storm and remove each clip one at a time on a mild day above freezing.
If working from a ladder near ice worries you, a gutter cleaning service can clear packed debris before the lights go up, which gives clips a solid surface to grip. For steep roofs and two-story homes, our guide to DIY versus professional holiday light installation covers where hiring out makes sense. Gutter Boys installs guards and hangs lights on North Jersey homes, and the advice stays the same on each roofline: confirm the fit before you hang anything.
While you’re still on the ground, snap the clip onto your light strand, then hook it onto the gutter lip or mounting surface. It should click into place with light thumb pressure. Don’t force it: the clip may not fit your gutter profile, or a gutter guard may be in the way. Make sure the gutter edge is clean and dry so the clip sits flat.
Yes - remove gutter-mounted lights before a major North Jersey snowstorm. Snow and ice can slide off the roof in one slab, snag the light strands, and rip the entire gutter run from your home.
In areas with heavy snow, shingle tabs along the shingle line are safer than gutter-lip clips. They keep lights out of the path of snow and ice sliding off the roof.
Look for these signs of damage:

.png)