


August 30, 2026
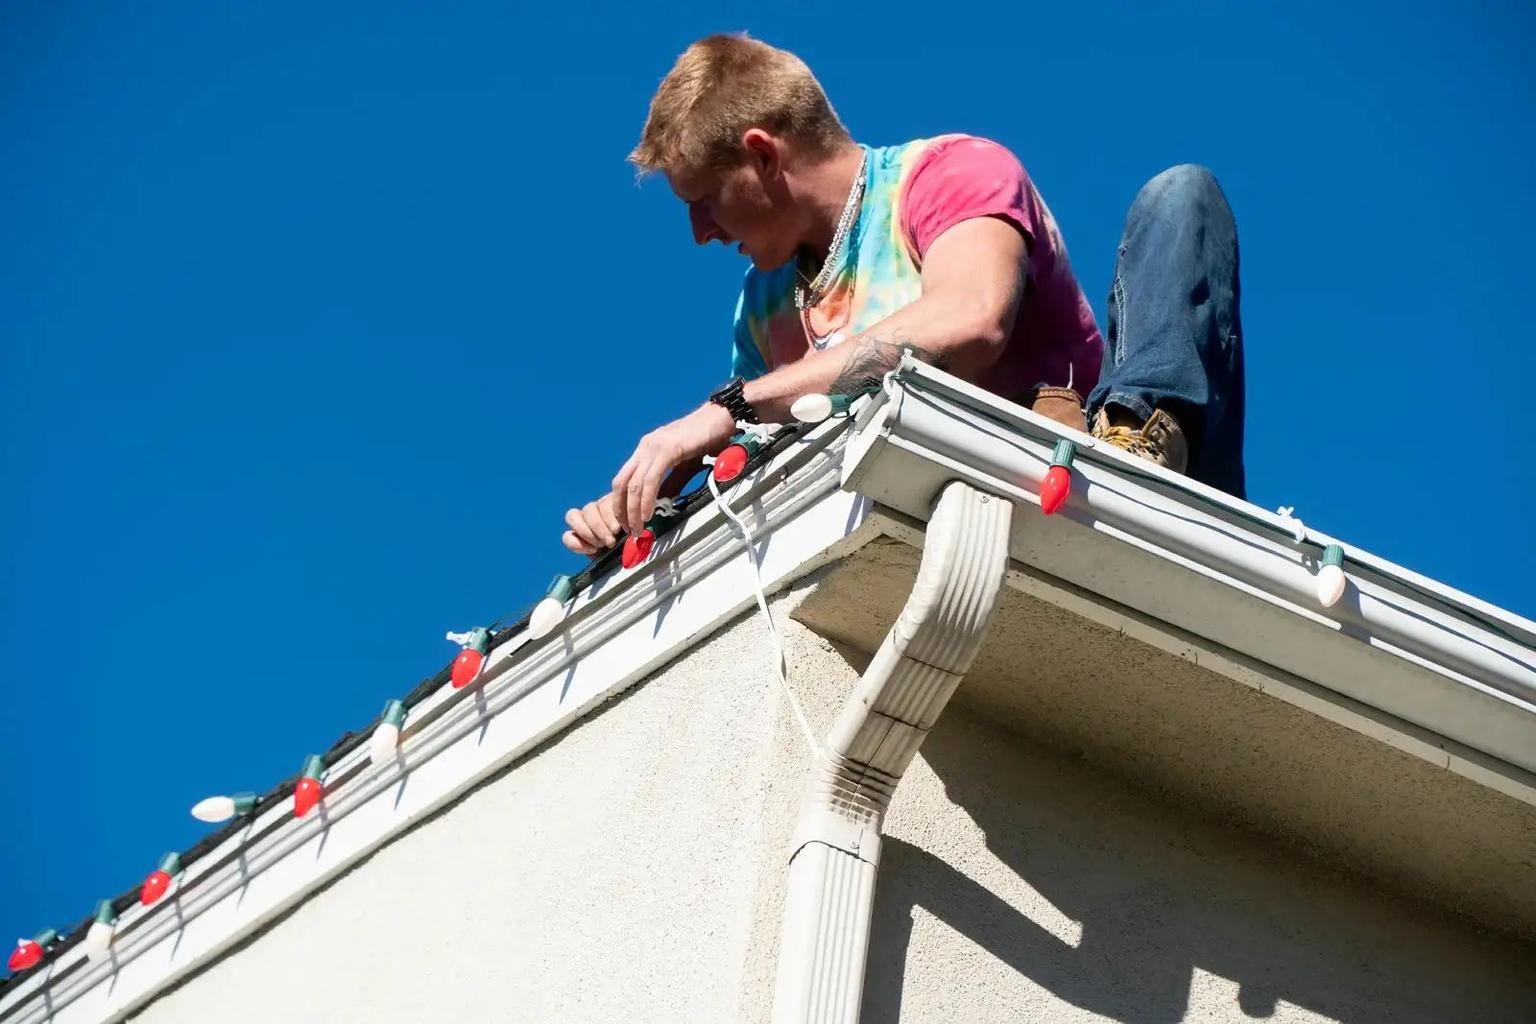
If your display is small, low, and simple, DIY can save money. If your roof is high, steep, or hard to reach, hiring a pro is usually the safer choice.
Your decision comes down to cost, time, safety, design, and upkeep. A basic DIY setup often runs $250 to $800 at the start, but your full season can take 18 to 31 hours. A professional crew costs more, yet that price often includes installation, repairs, takedown, and storage, while cutting your time to 0 homeowner hours.
Here’s the short version:
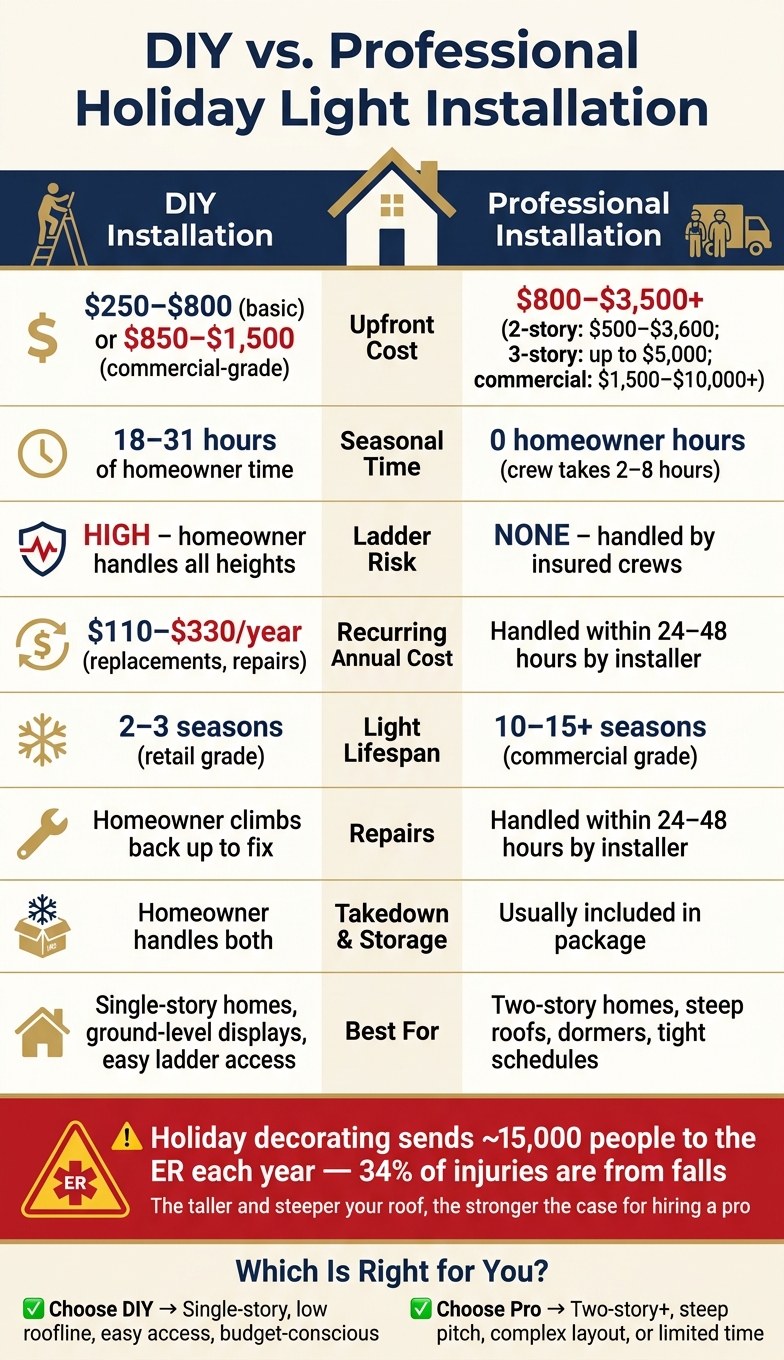
DIY vs. Professional Holiday Light Installation: Cost, Time & Safety Compared
| Factor | DIY | Professional |
|---|---|---|
| Upfront cost | Lower | Higher |
| Time | 18–31 hours | 2–8 crew hours |
| Ladder risk | Yours | Crew handles it |
| Best for | Small, low setups | Tall or hard-to-reach homes |
| Repairs | You fix them | Installer usually fixes them |
| Takedown and storage | You handle both | Often included |
| Finish | Depends on your skill and retail light lengths | Cleaner, custom-fit look |
If you want the lower starting cost and your home is easy to handle, DIY can work. If you want less risk, less hassle, and a cleaner result, professional installation is often the better fit. The rest of the article breaks down where each option makes sense.
DIY can cost less at the start. But you’re also the one doing the measuring, hanging, testing, fixing, and taking everything down later.
Before you buy a single strand, measure your roofline, porch posts, shrubs, and walkways you want to light. That number tells you how many feet of lights you need. Skip this step, and you’ll likely end up with bare spots or extra cord you have to tuck away.
Most DIY setups need:
If you don’t already have a 24-foot extension ladder, that can add $200–$400 to your budget. And every outdoor strand should plug into a GFCI-protected outlet to lower shock risk.
Test every strand on the ground before you climb the ladder. It’s a small step, but it can save a lot of back-and-forth later.
Once you know the gear and ladder needs, the next issue is simple: is your property easy enough to do safely?
A single-story home with a simple, low roofline can be a good fit for DIY. The same goes for displays that stay at ground level, like bushes, porch posts, and window frames. If the setup is small and the risk is low, a capable homeowner can usually handle it with the right gear and a few free hours.
DIY makes the most sense when you already own a steady ladder, have someone who can help steady it, and feel comfortable working at low heights. In that case, first-year material cost for a basic setup is usually $250–$800.
If you move up to commercial-grade LED strands with tougher cords, sealed sockets, and replaceable bulbs, that first-year cost jumps to $850–$1,500. The upside is lifespan: those lights can last 10–15+ seasons, compared with 2–3 seasons for retail-grade strands.
That math starts to shift fast when the roof is steeper, taller, or tougher to reach.
The savings are there. But they come with a price in time, safety, and upkeep.
For a 2,500-square-foot home, the full seasonal time commitment - planning, shopping, installation, troubleshooting, and takedown - runs 18 to 31 hours. For a lot of homeowners, that means two full weekends gone.
And the job doesn’t always end once the lights are up. If a strand goes out in the middle of the season, you may be back on the ladder in cold weather trying to find the problem. Then there’s January takedown, which often happens in rougher weather than installation.
The yearly DIY costs can also stack up through replacement strands, broken clips, and electricity. Those recurring costs can run $110–$330 per year.
Safety matters here too. The U.S. Consumer Product Safety Commission estimates about 15,000 holiday decorating injuries lead to emergency room visits each year, and falls make up 34% of those cases. That risk goes up fast with taller roofs, steep pitch, or icy conditions. And, not by chance, those are the same situations where DIY gets much harder to defend.
Professional installation costs more at the start. But you're not just paying for someone to hang lights. You're paying for the full job: design, setup, repairs, takedown, and storage. That matters most when the property is tall, has a tricky roofline, or needs to be ready on a tight schedule.
Professional crews usually use commercial-grade C7 or C9 LED bulbs with heavy-gauge wire and gasketed sockets. They cut each run to match your roofline exactly, so you don't end up with visible tails, awkward gaps, or bunching at the ends. If part of the display stops working, they come back and fix it. When the season ends, they take everything down and store it off-site in climate-controlled conditions.
This route starts to make a lot more sense as the home gets taller or the roofline gets more complex. The DIY math changes fast. What looks like a way to save money on a one-story home can turn into a safety problem on a two-story house with multiple gables, dormers, or a steep pitch.
It’s not just more work. It’s harder to do safely without the right gear and training.
Cost climbs with height and layout. Two-story homes usually fall between $500 and $3,600, while three-story properties can hit $5,000. For commercial properties, professional installation often starts around $1,500 to $3,000 and can go past $10,000 for large or elaborate displays.
For businesses, the draw is pretty simple:
Professional crews also help keep employees off ladders, work around business hours, and make sure the whole frontage looks consistent.
For most property owners, the biggest win is time. A job that can take a homeowner 18 to 31 hours over the course of the season can often be finished by a professional crew in about 2 to 8 hours.
Then there’s the headache factor. If a strand goes dark in December, that’s on the installer, not you. And honestly, that peace of mind is a big part of what people are buying.
Once you decide to hire a crew, two things matter next: timing and insurance. Book early, because November installation slots fill up fast. And before you sign anything, ask for proof of general liability and workers’ comp.
Here’s the shortest way to compare the two options.
| Factor | DIY Installation | Professional Service |
|---|---|---|
| Total Seasonal Cost | $250–$1,500+ (Year 1) | $800–$3,500+ (design, materials, install, takedown, and storage included) |
| Time Required | 18–31 hours of personal time | 2–8 crew hours; 0 hours for homeowner |
| Ladder Exposure | High; homeowner handles all heights | None; handled by insured crews |
| Electrical Planning | Homeowner manages load and GFCI outlets | Load planning and timer setup handled by crew |
| Design Quality | Limited by retail lengths and DIY skill | Custom-cut, even, and matched to the roofline |
| Maintenance | Homeowner troubleshoots and climbs | Repairs usually handled within 24–48 hours |
The table lays out the basic tradeoff. DIY usually wins on up-front price. Professional service saves time, removes ladder work, and gives you a cleaner finish. So the next step is pretty simple: decide which matters more for your property - time, risk, or the final look.
DIY costs less at the start. Professional service costs more, but that price usually covers labor, repairs, takedown, and storage too. That bundle can make a big difference over a full season.
For a small home with a low roofline, DIY can stay pretty reasonable. But once the house gets taller or the roofline gets more complex, the hours add up fast. At that point, paying for a crew can start to make more sense than spending 18–31 hours of your own time.
When the price gap feels smaller than expected, safety and power planning often become the deciding factors.
With DIY, the homeowner handles the ladder work and figures out the electrical load. With a professional service, trained crews take care of both. That shift matters, especially on taller homes or tricky rooflines where one small mistake can turn into a bad day.
A few basics still matter either way:
For tall or more detailed rooflines, professional service is usually the safer choice.
Cost and safety are the big talking points, but the finished look matters too. So does the amount of upkeep you’re signing up for.
Here’s where the material difference starts:
| Item | DIY (Retail Grade) | Professional (Commercial Grade) |
|---|---|---|
| Lights | Thin wire; 2–3 season lifespan | Heavy-gauge wire, gasketed sockets; 10–15+ year lifespan |
| Clips | Generic plastic or metal staples | Surface-specific, non-damaging commercial clips |
| Connections | Often exposed or taped | Waterproofed or gasketed against moisture |
Professional installs tend to look cleaner because the wire is cut to match the roofline exactly. That gets rid of visible tails, uneven spacing, and bunching. It’s the difference between “we put lights up” and a display that looks neat from the curb.
There’s also the upkeep side. Professional service often includes mid-season repairs and scheduled takedown. Storage is usually part of the package too. If you want the whole job handled from start to finish, that part carries a lot of weight.
After looking at cost, time, safety, and upkeep, the answer is usually pretty clear. In most cases, it comes down to three things: roof height, how much time you have, and how comfortable you are on a ladder.
DIY makes sense for small, ground-level displays. Think single-story homes, simple accents near the ground, and spots with easy ladder access.
That setup works well when the job stays small and the risk stays low. But once the roofline gets higher or the display starts to spread across more of the house, the math changes fast.
Professional service is the better fit when the roofline adds risk or your schedule is packed. If you have a two-story home, a steep roof pitch, or several gables, hiring a crew is the safer and smarter move, especially if you don't want to spend 18–31 hours planning, setting everything up, fixing issues, and taking it all down.
Full-service packages usually include design, repairs, takedown, and storage. For bigger, more demanding properties, that makes professional holiday light installation the practical option. Companies like Gutter Boys build their packages around exactly this kind of property: tall, complex, or hard to reach without the right equipment.
Small and simple usually points to DIY. Larger, taller, or more involved displays usually point to a professional crew. If your property is high, complex, or tough to reach, professional installation is the safer, simpler choice.
DIY can be too risky when your roof is two stories or higher, has a steep pitch, or includes tricky features like multiple gables, dormers, or valleys.
If you can’t reach the area safely from a stable ladder, have to improvise access, lean a ladder against a gutter, or work in cold, wet, or windy weather, it’s usually smarter to hire a professional. Mature trees nearby can make the job harder too. The same goes for slate or tile roofing, which can be easy to damage and harder to walk on safely.
Ask exactly what the quote covers: products, installation, in-season maintenance, scheduled takedown, and off-season storage. Also ask for a certificate of insurance so you can confirm general liability and, if needed, workers' compensation.
If you plan to supply any materials yourself, ask how that changes the design, electrical planning, service limits, and who handles future repairs. It’s also smart to confirm the company can work with your home’s height and access needs.
Often, yes. Professional installation gives small businesses a polished display without asking employees to deal with risky ladder work or seasonal upkeep.
It also means one company can handle the whole job - design, installation, repairs, takedown, and storage. That can help lower liability concerns and keep disruptions to customer traffic or day-to-day operations to a minimum.

.png)